Building a Workflow
1. Add nodes
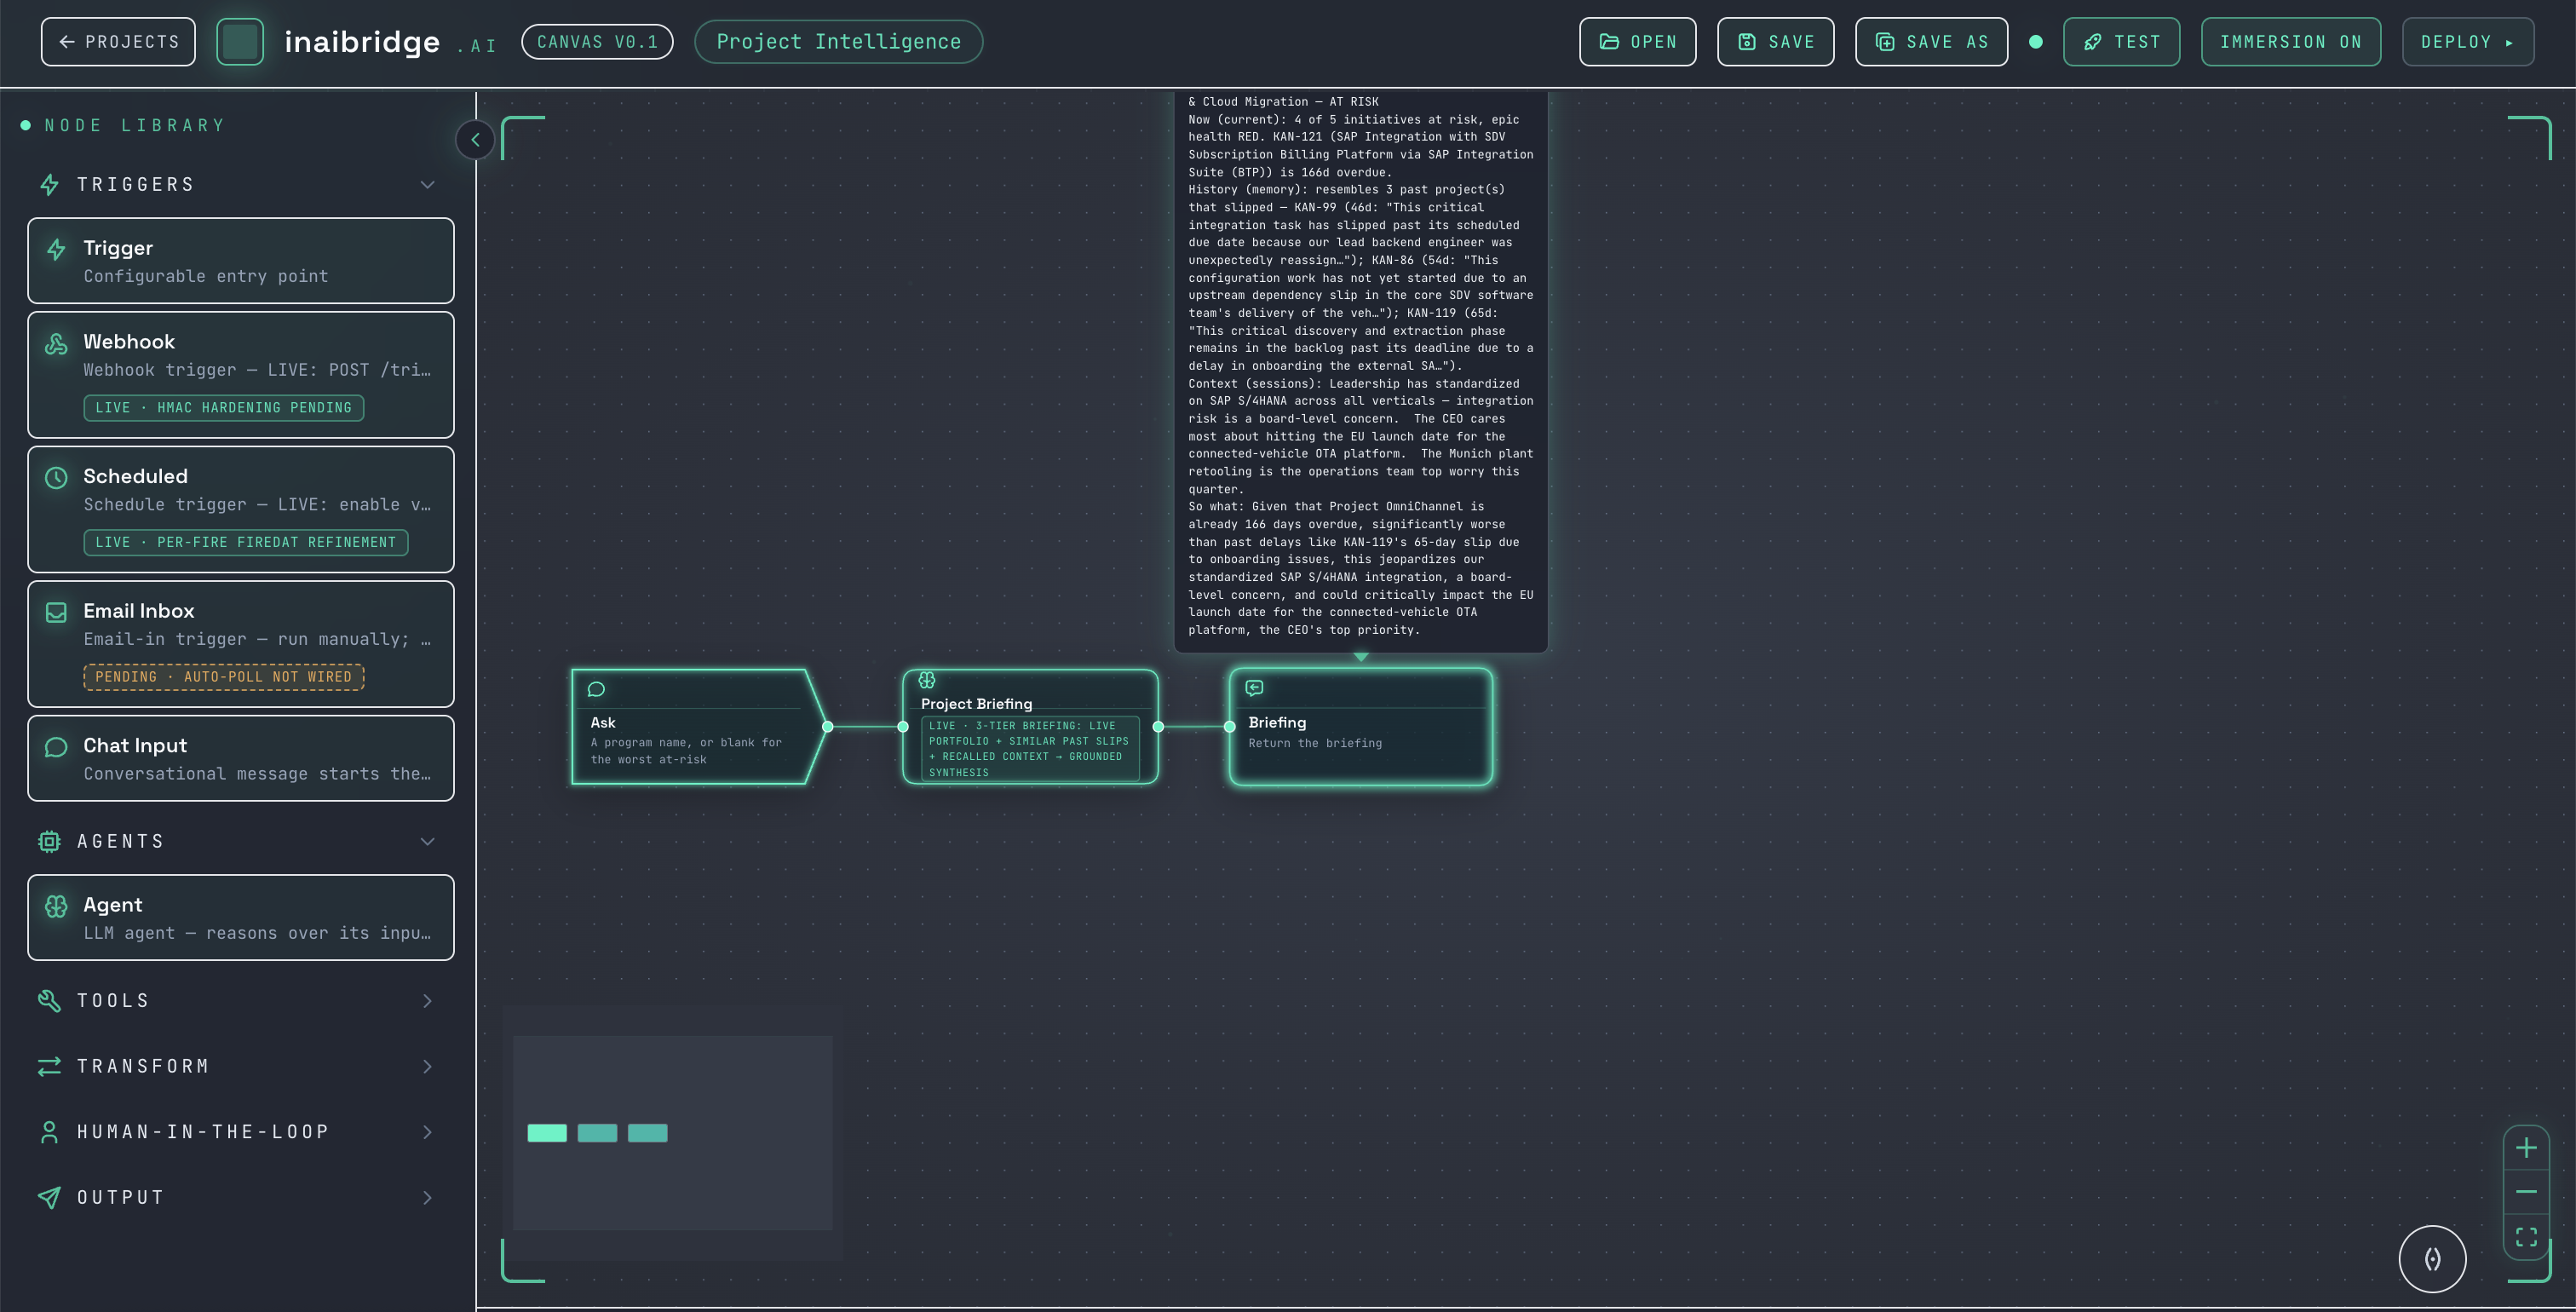
Open the node library and drag nodes onto the canvas — start with a trigger.
2. Connect them
Draw a connection from one node's output to the next node's input. Data flows along the connection: each node passes its result to the next.
[ Chat input ] → [ Ingest Source ] → [ Chat output ]
3. Configure each node
Select a node to open its configuration. Set the fields it needs — for example, choose the source on an Ingest Source node.
4. Run
Run the workflow from the canvas. It executes node by node: each node shows its live status as the run moves through it, and each node's output feeds the next. The final node delivers the result.
If a node fails, the run stops at that node and surfaces the error there — so you can see exactly where and why it stopped, rather than a single opaque failure.
Workflows that include a human-in-the-loop gate pause at that gate and wait for a decision in the Inbox before continuing.
Tips
- Start from a canned workflow and modify it, rather than building from scratch.
- Keep workflows focused — one clear job per workflow.